
Tuesday, November 25, 2014

Saturday, August 16, 2014
A Lovely Crochet Backpack
When I was in High School I went on a missions trip to Honduras. While there I purchased a woven backpack that I used and loved for years. Over time it ended up getting packed away with other sentimental items. When I recently had a need for a small, lightweight, and flexible carrying sack my mind immediately thought of my well loved Honduras pack. When I dug it up I was dismayed to find out that some hungry moth larvae had GONE TO TOWN. While I do have plans of stitching up the original backpack, I thought, why not make myself a new one in the meantime?!

I used this opportunity to improve on the original Honduras backpack design. I did not like having to tie and untie a drawstring to open the backpack so my husband and I came up with a unique drawstring design with the straps that automatically closes when you put the backpack on your back! Soooo handy! I customized the straps to be a little shorter too so the bag didn't sag down too far on my back.
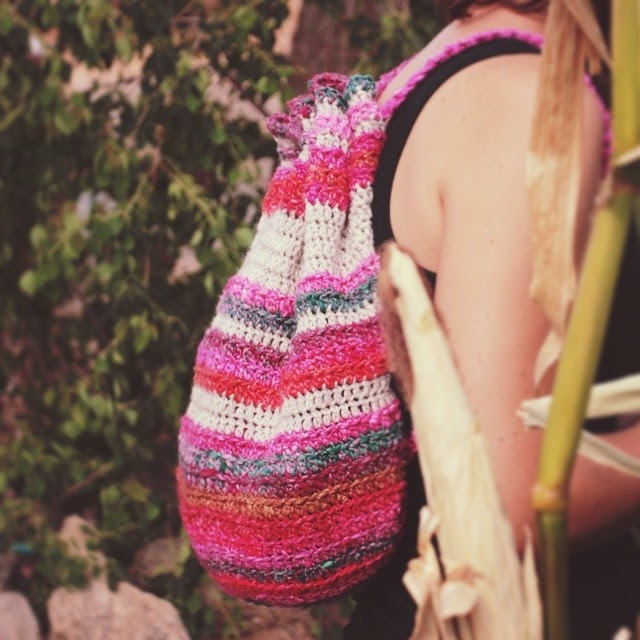
I was able to use some wonderful Noro yarn that I had in my stash. To help stretch it out a bit (I only had 2 skeins of the yarn and I don't know if they still offer it for sale), I used a neutral color fisherman's wool yarn that I had in my stash too. I love the way the neutral color makes the multi-color Noro yarn pop even more!

When I posted this original photo I had several people comment on my lovely basket (since I didn't say I was making a backpack). I LOVE the idea of making a basket like this! I might just have to make a little matching set! :)
Friday, August 15, 2014
Mason Jar Cozy
I'm so excited to show off my mason jar cozy! I love the way the colors came together and not sure if you noticed, but there is a cute triangle pattern in the bottom 3 layers of the tan color sections. Isn't it cute?! It stretched out a tad after several uses but I put it in the washer and dryer and it shrunk right up again...good as new! :)


Saturday, July 05, 2014


Thursday, June 19, 2014
Handmade Crochet Hooks & Succulents ♥
This past weekend I had a little photo session with my two loves:
Crochet & Succulents
Thought it might be fun to share. ;)
BTW, the hooks in these photos were carved by my awesome hubby. Whenever I'm feeling in-need-of-love he surprises me with a new hook. He takes first prize.


Tuesday, June 17, 2014
Monster Cucumbers!

It's too bad these giants turned out bitter! Aren't they just so fun to look at though?! Oh well, off to the compost pile they go... I couldn't help but make a little Instagram collage too. hehe

Saturday, June 14, 2014
Today's Harvest: Lemon Cucumbers & A Tiny Bell Pepper
It seems like every day I get to pick a few more goodies out of our garden.
Today I found 3 beautiful lemon cucumbers just asking to be cut up and thrown into a delicious salad.
I also found this little green bell pepper.
According to the label on the plant, this guy is supposed to be red.
Upon close inspection this pepper was telling me it was ready to be harvested...I think.
The skin was getting slightly wrinkled on the bottom and the body of the pepper felt hollow and pliable.
Aren't they so pretty?!

Sunday, June 08, 2014
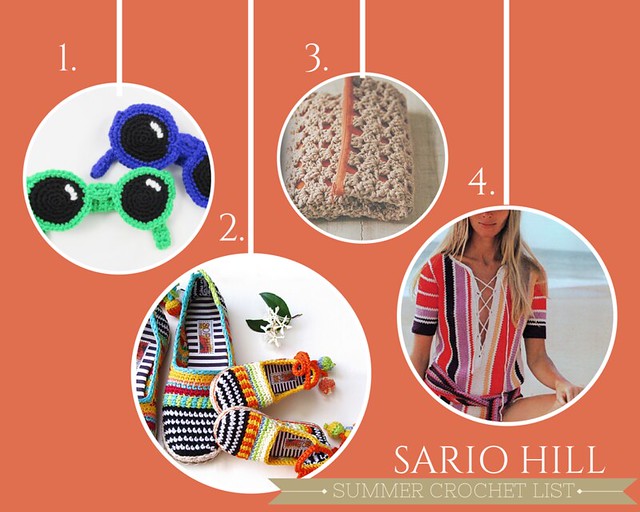
Six Links You'll Love
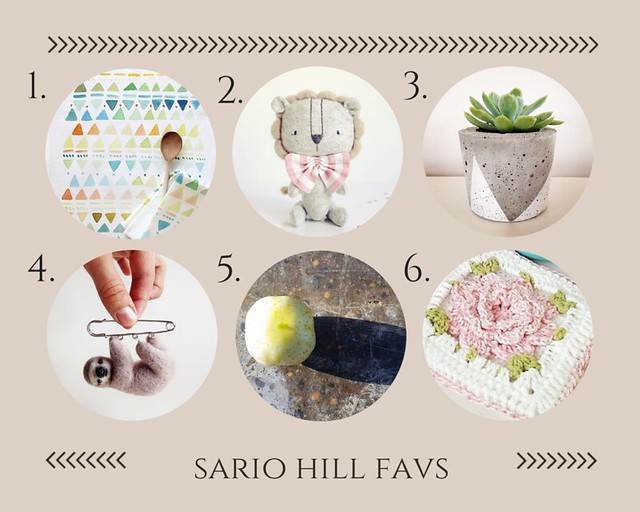
Saturday, June 07, 2014

Friday, June 06, 2014
Sweet Cuddly Bunny
Ohhhhhh isn't this cuddly bunny so sweet?! She was a special order from a brand new Grandpa. I think she will look beautiful in her new home and be a loving companion to his granddaughter.


Wednesday, June 04, 2014
In The Garden Today
Lemon Cucumber
These are so pretty when they are ripe. The skin is a pearly white where it's been stretched out with little strips of yellow shining through.

Bell Pepper
I was so excited to find this guy hiding between the giant tomatoes. I wasn't sure that we would get any this season because their leaves are all deformed from being blocked out from the sun. They are survivors.

A dead bat in the house....wait...still, worth mentioning.
Willy: "Mommy, I have some really sad news. I found this dead bat on the stairs." Holding this tiny dead bat in his sweet little hand.

Not pictured but also worth mentioning:
Coyote chillin' in our front yard (driving the dogs nuts), and a mouse in my car...literally IN my car...as I'm driving. Yeah.
Saturday, May 31, 2014
Veggie Garden Harvest & Tomato Worms
Ahhhh Saturdays. To me Saturday means coffee in the garden, extra time to search for tomato worms, inspect strange bugs, and dote over my succulents. Glorious.


This morning I harvested some Snap Peas that the kids started at school. They put a paper towel in the bottom of a plastic sandwich bag, added a little water and dropped a seed in. I was amazed at how quickly they germinated with such little sunlight. We brought the seedlings home and planted them in the garden and they took off! They are definitely going on my seed list for next year's garden.
I squished about eight tomato worms this morning. Five to eight seems to be the daily average. Since tomato worms are the same color as the leaves they can be hard to spot. So, rather that searching for the worms, I look for their poo!
See the little black dots on that leaf? Those are tiny tomato worm poo! After you spot those, just look up.
Do you see him standing up on the leaf? He knew I was looking for him so he got in his defensive stance. When they get bigger they actually start making a clicking sound (with their teeth?).
Don't forget to shake the poo off the leaf below so you can find fresh poo the next day!
Friday, May 30, 2014
Daily Garden
Well, I failed miserably at the daily photo challenge. I'm not too broken up about it though because a new daily activity formed rather organically in April.
Will and I dream of being completely self sufficient some day. We try to implement things in our lives that either make us more self sufficient or provide an opportunity to become more self sufficient in the future.
Growing our own food is not something that is necessary right now (we can just go to the store and buy what we need for less than it takes to grow our own) but gaining the experience in doing so is invaluable.
So, this year my super awesome and amazingly talented hubby decided to test out a self-watering, raised bed garden planter. After some research he grabbed a few ideas from some different sources and came up with his own plan for getting it done. He tweaked it a bit more and then went for it using materials that we have on hand. This is the absolutely beautiful garden that he came up with.

"Why is it so cool?", you may ask. Let me tell you!!
 #1: I only have to water once a week. Yes, once a week!! I could probably go longer when the weather cools (we are hoping to use this garden year round since our winters are so mild). From what I've read, sub-irrigated planters can save up to 80% water. Love the sound of that!!
#2: No rodents snacking on my veggies. We have are big problem with squirrels and cotton tail rabbits about this time of year and I haven't seen any nibbles yet.
#3: Virtually no weeds. I pulled ONE weed (we think it came from a bird poo). We added the cover option to help with that (those criss-crossed pipes).
#4: Using the principles of Square Foot Gardening we were able to fit a lot of plants in a compact space (our garden is 4'x8').
#5: Having the planter raised makes gardening a fun task. I find myself wandering out to check on it at least a couple times a day.
I'm sure there are a bunch more reasons why sub-irrigated planters are a superior for of gardening. I just can't get enough and have begun my own small pot versions too!
I've started a Daily Garden Journal on Pinterest. If you want to see my garden grow from Day 4 (I missed day 1-3!) Click here and follow my board for daily updates.This is what I pinned this morning:


Friday, January 03, 2014
"Waiting Patiently" (Photo #2)
 |
| Waiting patiently for warm bodies and warmer days. |
"A Romping Hike" (Photo #3)

We love to go on adventures in our front yard. Willy brought snacks (leftover mac & cheese from Mar Mar's house) and Molly grabbed her video camera. The dogs love showing us their favorite play spots way out front where the squirrels like to hide. In this photo Willy is marching closer and closer to Molly till he finally crashes into her....punk.
Thursday, January 02, 2014
2014 Photo Project...Dare I Take The Challenge?!
365 Inspiring Photographs
I follow a lovely little knitting blog called Polka Dot Cottage. Her most recent post was about starting a 365 day project revolving around photography. She is starting her 6th year-long photo project (Wow!) which has inspired me to give it a shot as well! Her project will be structured, taking specific shots per day based on a monthly theme. I think I'm going to be a little more generic and take 365 photos of things that give me inspiration.
"Stripped Away" (photo #1)

This photo is such a great depiction of Winter. Everything is bare and exposed. You can really see all of the intricacy of the twigs, bleached by the sun, twisting together and around each other. Reminds me of beautiful lace. Dare I say...I'm feeling inspired! ;) As Google puts it, inspiration is "The process of being mentally stimulated to do or feel something, especially to do something creative." Bring on the inspiration!!
Friday, August 09, 2013
Meet Amigurumi Willy - The Retro Inspired, Flat Faced, Boy Doll
Willy's Amiguru"Me"
My last post introduced you to the fabulous craft of Amigurumi and I showed you Molly Doll who was made for my daughter Molly. After making Molly Doll I just had to make a doll for my son Willy too, and of coarse he wanted a doll made in his likeness just like Molly's. So I set out to make Willy's Amiguru"Me" (hehe, isn't that cute!). I wanted to try something a little different and I was inspired to try making a sort of abstract, retro inspired doll with a flat head like the old Raggedy Ann dolls. It was really fun figuring this guy out and really simple to make! As you can see I haven't been able to bring myself to make a face for him yet in fear that I will mess him up. Willy thinks he is sad without a face. What kind of expression do you think Willy Doll should have?
I will post the pattern soon but couldn't wait to get a couple pictures of him up after reading AmigurumiBB's Blog post about her flat-headed boy doll. I just LOVE the curly hair that she gave him. Check back here soon for Willy's free pattern and learn how I gave him his permanent curly locks and created the flat head and movable hands, feet, legs, and arms. :)


Monday, July 29, 2013
"Amigurumi What?" Learn a New Craft & Meet Molly Dolly!!
Here's a fun little lesson on my very favorite hobby....Crochet!
Amigurumi: knitted or crocheted stuffed toys. This word is made up of a combination of two Japanese words, ami (meaning to knit or crochet) and nuigurumi (meaning stuffed doll). Honestly I don't know how the word stuck here in America. I couldn't pronounce it for years and finally just picked a pronunciation that made me stutter the least...(ah-mee-goo-roo-mi). Go ahead and give it a try...out loud...no one is listening...it's kinda fun to say actually. Good, now when you talk to someone about amigurumi you will sound like a pro (cause I'm sure crochet comes up in most of your daily conversations, right?). Well, it is the word most commonly used for these cute cuddly crochet creatures with big heads and wide set eyes. I first learned to crochet amigurumi by taking Stacey Trock's "Amigurumi: Design Your Own Monster" class on Craftsy. She teaches you the basics of making amigurumi so you can branch off and create pretty much anything you want with crochet. It's a great class & I highly recommend it if you are interested in trying out this really fun craft. Now I'm going to show you my first amigurumi doll (I think you are going to love her!)!!
Meet Molly Dolly, my first amigurumi doll. :)
I made Molly Dolly for my daughter, Molly (hmmm, go figure) and she Loved her! My goal for Molly Dolly was to add a bunch of details that will make her look and feel more "real". She still has the proportions of an amigurumi doll (really just the big head and wide set eyes) but she also has eyelashes, puffy cheeks, a waist, her arms move, she has hands with fingers, and she has little defined knees. I tried giving her ankles and little feet but as you can see I didn't make her legs long enough so she ended up with cankles (sorry about that Molly Dolly!).

I learned how to attach Molly Dolly's arms and make her hands with fingers from Sharon Ojala on You Tube. I really like the arms attached this way because they move around a lot and I think the shoulders look so cute. They definitely need to be tightened and knotted more than you think because they tend to loosen up each time they are played with. I don't know if I will make hands with fingers again...it was a lot of work and I don't think the payoff was that great. Don't they look kinda stubby and big to you?

Molly's hair was made by making a wig cap and attaching strands of hair to the cap. I'm on the lookout for a better method of making amigurumi doll hair. I really like the the "BB Doll's" hair ideas on "AmigurumiBB's blog". I might try one of these styles for my next doll. The cap took so long to make (essentially you are making half the head again) and then the attached hair was too thick. As I tried to thin the hair out it just looked like she grew bald spots on her head. Grrrr, frustrating!
Molly Dolly's dress is removable too! I did this in hopes of creating different outfits that Molly could dress her up in. I love the way the dress turned out and it was SO easy to make!

I'd love to hear what you think about her and any ideas on what I can improve on for round 2!
Saturday, July 27, 2013
Exploring with Ms. Cortez
The Trip
Last month we were lucky enough to take my in-law's recently fixed up 1974 Cortez motor-home out for her maiden voyage (can you say that for motor-homes or is that only for ships?). Our destination was Morro Bay where we parked Ms. Cortez at the Morro Strand RV park. I've never stayed in an RV park (that I can remember anyway) so I'd say this place was pretty nice. They had good facilities and full hook-ups at a reasonable price. As we are pulling in to Morro Bay and the kids had the windows open in the back. I heard them breath in deeply and say "Ahhh, smell that ocean air!" I took their advice, opened my side window, stuck my head out and breathed in deeply...Wow. The downside of Morro Strand RV park?...downwind from a Waste Water Treatment Plant. Nooot really ocean air that you're smelling there kiddos. But I was good and kept my mouth shut (at least in front of them) so they enjoyed the "ocean air" smell the whole trip. Kids, you gotta love 'em.

The Dunes
Almost immediately after we arrived the kids wanted to go to the beach. Morro Strand advertises that it is within walking distance from the beach so we put on our sweaters and headed west. Half a mile later we saw sand (phew!). The beach was actually really cool. There were dunes everywhere and the wind was so strong that all the sand was brushed smooth making it feel as though were were the first people to discover a lost island. So we recorded our discovery, searched for shells and treasures washed up to shore, and made our way along the beautiful beach towards town.


Flying Kites
The next day we woke up knowing exactly what we wanted to do...fly some kites! There is this great little kite shop down town Morro Bay that we visited after breakfast. Will had already done research on the type of kites that we wanted so we were quickly in and out and headed to the windy beach to set them off. It's so funny to me that holding a string and staring up into the sky at a little floating piece of material can be so exciting and interesting to a 5 & 6 year old. I got bored fast (wait, who's the child here?) and frustrated that the sand kept blowing on my camera and towel so we didn't spend too long on the beach before we trotted off on another adventure.
 |
| This picture depicts pretty much the entire trip...Molly and Daddy far ahead of Willy and me 'till something interesting happens and Willy sprints off to check it out for himself. |


Climbing on Rocks
On our last day we headed out to Morro Rock to do a little rock climbing. Oh how thrilling it was to climb the rocks to the big red "DANGER" sign...and then keep going! It's not expressly forbidden to climb out on the rocks so of course we went for it. Molly and Willy carefully watched me to make sure I didn't slip or fall in any way. Really though, they are better climbers and more coordinated at that sort of thing than I could ever dream to be. The tide was down so we saw tons of colorful starfish and barnacles stuck to the rocks. We saw a few crabs, some weird seaweed and several things we couldn't even identify.


We left Morro Bay with wonderful memories, took Ms. Cortez back to her home and promised that we would take her exploring again soon.
Subscribe to:
Posts
(
Atom
)